Today, I fleshed out “stages” more, and enabled the ability to have random encounters (from a fixed set). Additionally, I added a new enemy: a blue chopper which fires 3 bullets in rapid succession, instead of just 1 at a time. I’m not really going to get into the details about it since it’s a pretty simple implementation, though I did make an abstract Chopper object that both green and blue extend.
Anyway, to create a random encounter, I needed to do some refactoring.
Encounter Refactoring
The general plan was this:
- A “stage” is a pool of encounters, and a number of encounters that can occur.
- The stage has a coroutine to spawn child coroutines, one for each encounter. When an encounter completes, wait a brief period, then start the next.
- The check to see if an encounter is complete should be common; I shouldn’t have to duplicate that code in each encounter.
- Encounters should be distinct classes, but implement a common interface so the pool of them within a stage are all of a predictable type.
So, I created a simple encounter interface:
public interface IEncounter
{
    List<Enemy> Spawn();
}
And an implementation:
public class EncounterNineRight : IEncounter
{
    public List<Enemy> Spawn(EnemySpawner spawner)
    {
        List<Enemy> enemies = new();
        // do stuff...
        return enemies;
    }
}
But the issue here is that the encounter needs to be able to spawn enemies. However, it doesn’t extend MonoBehaviour, so it can’t access Instantiate! So, we’re going to have a new MonoBehaviour called EnemySpawner whose sole job is to give access to the creation of Enemy objects:
public class EnemySpawner : MonoBehaviour
{
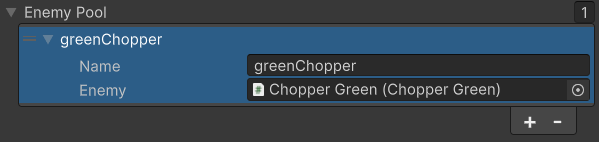
[SerializeField] private StageEnemy[] enemyPool;
private readonly Dictionary<string, Enemy> _enemies = new();
private void Awake()
{
foreach (var enemy in enemyPool)
{
_enemies.Add(enemy.name, enemy.enemy);
}
}
public Enemy Spawn(string enemyName, Vector2 position, Quaternion rotation)
{
return Instantiate(_enemies[enemyName], position, rotation);
}
Note that I moved the enemyPool into EnemySpawner, rather than the stage’s MonoBehaviour. This felt like a better place for it.
With this in hand, I can change the interface method to take this as an argument, and now implementations of the interface can utilize the EnemySpawner to create enemies. Nice. And so, my stage now has a pool of encounters, and spawns a coroutine that randomly chooses one. The logic to detect when an encounter is complete (all enemies dead) is common; it doesn’t matter which IEncounter it is, the check is the same.
[SerializeField] private int encounterCount;

private EnemySpawner _spawner;
private readonly List<IEncounter> _encounters = new()
{
    new EncounterNineRight(),
    new EncounterFourEachSide(),
    new EncounterWigglers(),
    new EncounterTwoCircles()
};

private void Awake()
{
    _spawner = GetComponent<EnemySpawner>();
}

private void Start()
{
    StartCoroutine(RunStage());
}

private IEnumerator RunStage()
{
    var random = new System.Random();

    var encounters = 0;
    while (encounters < encounterCount)
    {
        var encounterIndex = random.Next(0, _encounters.Count);
        yield return StartCoroutine(RunEncounter(encounterIndex));
        encounters++;

        // Wait 5 seconds before the next encounter.
        yield return new WaitForSeconds(5);
    }
}

private IEnumerator RunEncounter(int encounterIndex)
{
    var encounter = _encounters[encounterIndex];
    var aliveEnemies = encounter.Spawn(_spawner);

    while (aliveEnemies.Count > 0)
    {
        yield return new WaitForSeconds(1);
        aliveEnemies.RemoveAll(enemy => enemy.IsDestroyed());
    }
}
We have a nice, flexible framework to define stages now. We just create implementations of IEncounter and toss them into the _encounters pool. Once the player defeats all the enemies, we wait 5 seconds and then move on to the next one. Once we hit our count, we’re done. No victory fanfare yet, of course, but…
Wiggler Encounter
I wanted to be able to have enemies move back in forth. For now, only vertically. Since I created a reasonable way to write new enemy actions last week (the IEnemyAction interface), I added a new VerticalWiggle action:
public class VerticalWiggle : IEnemyAction
{
    private readonly float _amplitude;
    private readonly float _speed;
    private readonly float _duration;

    public VerticalWiggle(float amplitude, float speed, float duration = -1)
    {
        _amplitude = amplitude;
        _speed = speed;
        _duration = duration;
    }

    public IEnumerator Action(GameObject enemyObject)
    {
        var startTime = Time.time;
        var initialY = enemyObject.transform.position.y;
        while (true)
        {
            var elapsedTime = Time.time - startTime;
            enemyObject.transform.position = new Vector2(
                enemyObject.transform.position.x,
                initialY + Mathf.Sin(elapsedTime * _speed) * _amplitude);
            yield return null;

            if (_duration > 0 && elapsedTime >= _duration)
            {
                break;
            }
        }
    }
}
Nothing fancy, just moving back and forth either infinitely, or for a duration. I may change duration to wiggle count instead, but for now it’s duration. I had some initial issues with their movement snapping to somewhere along the amplitude, but that was fixed by calculating elapsedTime instead of just using Time.time. This action may not happen on spawn (and usually won’t), so we have to calculate based on when the action begins instead.
Circle Encounter
I also want enemies to be able to move in a circle. This was a bit trickier and really had me reaching back into my brain for college trigonometry.
Basically, we determine the center of rotation initially (based on the initial angle we’re starting at the circle), then calculate a change in angle over time and reposition accordingly. Speed works differently, since we’re calculating the change in angle, not the linear change, so I’m calculating the angular speed initially instead. This way, movement speed is analogous to linear movement elsewhere.
Clockwise or counter-clockwise is governed by whether we reduce the angle or increase the angle. I considered using the built-in transform.RotateAround, but I wanted a way to limit the number of rotations, and it seemed harder to track that using the built-in function. If we do the math ourself, we just calculate how much angle we’ve traveled, and every 360 degrees is one rotation.
public class Circle : IEnemyAction
{
    private float _angle;

    private readonly float _radius;
    private readonly float _speed;
    private readonly float _maxAngle;
    private readonly int _direction;

    public Circle(
        float radius,
        float speed,
        bool isReverse = false,
        float startingAngle = 0,
        float rotations = -1)
    {
        _radius = radius;
        _speed = (speed / radius) * Mathf.Rad2Deg;
        _maxAngle = rotations * 360f;
        _direction = isReverse ? -1 : 1;
        _angle = startingAngle;
    }

    public IEnumerator Action(GameObject enemyObject)
    {
        var center = DetermineCenter(enemyObject.transform.position);
        var initialAngle = _angle;
        while (true)
        {
            _angle += _speed * Time.deltaTime * _direction;
            var angleInRadians = _angle * Mathf.Deg2Rad;

            var centerOffset = new Vector2(
                Mathf.Sin(angleInRadians) * _radius,
                Mathf.Cos(angleInRadians) * _radius);
            enemyObject.transform.position = center + centerOffset;

            if (_maxAngle > 0)
            {
                if (Mathf.Abs(_angle - initialAngle) >= _maxAngle)
                {
                    break;
                }
            }

            yield return null;
        }
    }

    private Vector2 DetermineCenter(Vector3 position)
    {
        var angleInRadians = _angle * Mathf.Deg2Rad;
        var offsetX = Mathf.Sin(angleInRadians) * _radius;
        var offsetY = Mathf.Cos(angleInRadians) * _radius;
        return new Vector2(position.x - offsetX, position.y - offsetY);
    }
}
In the gif above, you can see they start rotating from 90 degrees, rotate 2.5 times, then rotate in the opposite direction, again starting from 90 degrees. The encounter code looks like this:
public class EncounterTwoCircles : IEncounter
{
    public List<Enemy> Spawn(EnemySpawner spawner)
    {
        List<Enemy> enemies = new();
        enemies.AddRange(SpawnCircle(spawner, 7.5f, true));
        enemies.AddRange(SpawnCircle(spawner, 2.5f, false));
        return enemies;
    }

    private static List<Enemy> SpawnCircle(EnemySpawner spawner, float y, bool isReverse)
    {
        List<Enemy> enemies = new();
        for (var i = 0; i < 6; i++)
        {
            var enemy = spawner.Spawn("greenChopper", new Vector2(19 + i * 2.09f, y), Quaternion.identity);
            enemy.SetActions(
                new MoveToPosition(new Vector2(14, y), 4),
                new Circle(2, 4, isReverse, 90, 2.5f),
                new Circle(2, 4, !isReverse, 90));
            enemies.Add(enemy);
        }

        return enemies;
    }
}
The 2.09f may look like a magic number, but it’s so I could evenly space the enemies along the circumference. Given the radius is 2, and there are 6 enemies, 2πr / 6 = 2.09 units apart (r = 2).
Up Next
I think it’s finally time to track health visually (I’m already tracking it behind the scenes) and provide a death animation. I’m not sure if I need to do anything special for UI elements like this, but we’ll find out.